User Guide
A walkthrough of every 3D-DRIVE feature
Getting started
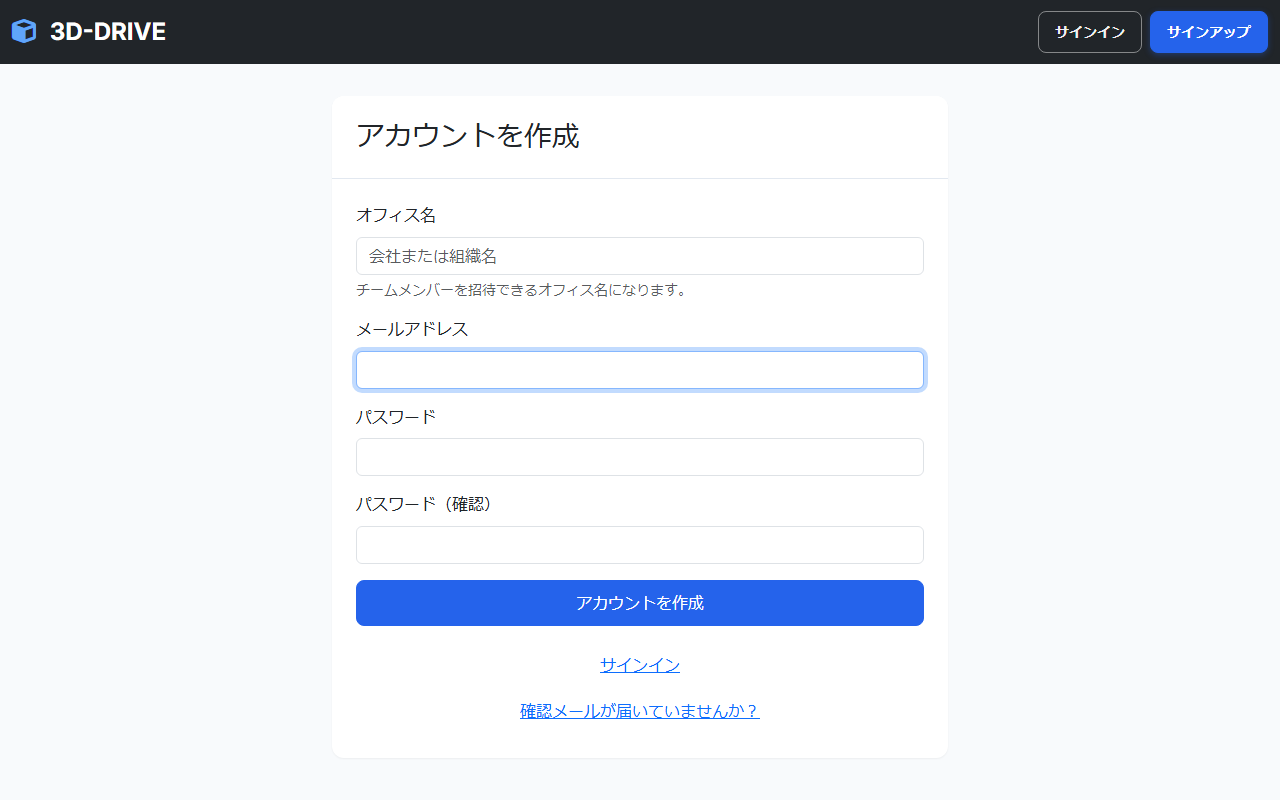
Create an account
Click “Get started free” on the top page
Open the registration form from the “Get started free” button in the top-right corner or in the hero area.
Enter your email, password, and office name
The office name is your team or company. You can change it later. After signing up, you become the admin of this office.
Confirm your email and sign in
A confirmation link is sent to the address you registered. Click it to activate your account.
Sign in and sign out
Sign in: use the “Sign in” button in the top right
Enter your email and password. If you belong to more than one office, an office picker is shown next.
Sign out: open the user menu in the top right → “Sign out”
Click your name in the top-right of the navbar to open the dropdown, then choose “Sign out” at the bottom.
Screen layout
Navbar (top)
Links to point clouds, the model library, the office page, the upload button, and the user menu
Sidebar (left)
Folder tree. Click to move between folders. A card above the tree also opens the model library.
Main area (center)
Cards for folders and point clouds. Check status and run actions here.
Footer (bottom)
Links to the terms of service, privacy policy, company information, and more.
3D viewer system requirements
How heavy a point cloud is to display depends not only on the device, but also on how many point clouds and 3D models are shown and on screen resolution. The table below is a practical guideline for using 3D-DRIVE.
| Item | Minimum (viewing a single point cloud) | Recommended (measurement and multiple datasets) |
|---|---|---|
| Browser | Latest Chrome, Edge, Safari, or Firefox, with JavaScript, WebGL, and hardware acceleration enabled | |
| Memory | 4 GB or more | 8 GB or more |
| CPU | 4 or more logical cores | 6 or more logical cores |
| GPU | WebGL-capable GPU | A relatively recent integrated GPU, or a dedicated GPU |
| Network | A stable 10 Mbps or faster connection | 20 Mbps or faster |
If the viewer does not appear or stops partway
- Close unused browser tabs and other apps, then reload the page.
- Update the browser to the latest version and enable hardware acceleration.
- If several point clouds or 3D models are shown, reduce how many are displayed.
- On a smartphone, use the mobile viewer.
Browsers cannot report exact GPU memory, so we do not block use based on spec numbers alone. Display is stopped only when WebGL itself cannot start; the page then shows the reason and what to try next.
Library (/point_clouds)
This is the main screen after you sign in. Manage uploaded point clouds and folders here.
Search the library
Use the search box at the top of the library. It matches folders, point clouds, annotations, and 3D models by name.
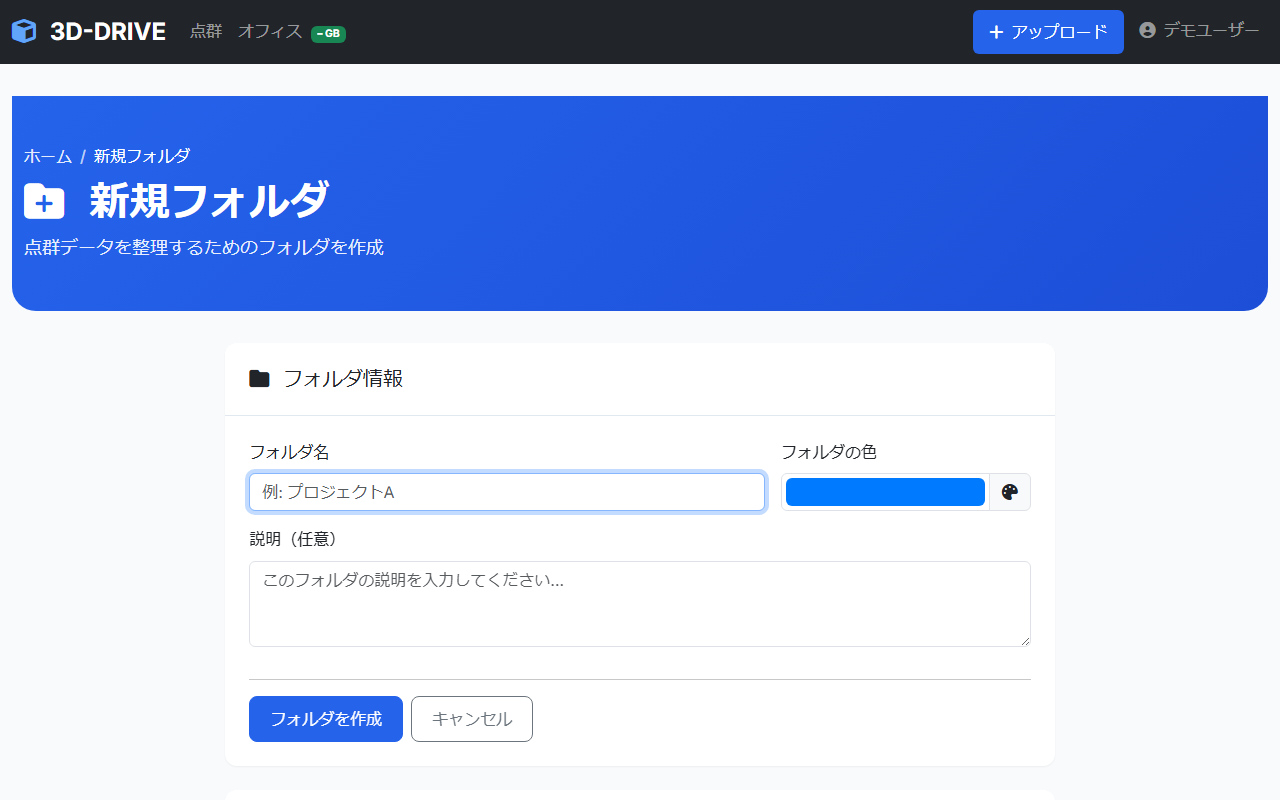
Create a folder
Click the “New folder” button
Use “+ New folder” in the top-right of the library or in the main area.
Enter a name, color, and description
Colors make folders easier to tell apart. A short description helps teammates understand what is inside.
Choose a parent folder to nest it
Folders can be nested. Pick an existing folder in the “Parent folder” field to create a subfolder inside it.
Point cloud status
Processing
Conversion is running after upload. It can take a few minutes.
Ready
Conversion finished and the dataset can be opened in the 3D viewer. Click the card to open it.
Failed
Conversion failed. Check the file format and size, then try uploading again.
Queued
The file is waiting in the conversion queue. Please wait a moment.
Move and reorder with drag and drop
Drag a folder or point cloud card
Grab the drag handle (⠿) on the left edge of the card.
Drop onto another folder to move it
Drop onto a folder icon to move the item into that folder.
Actions on each card
- Open in 3D viewer — View a converted point cloud in 3D
- Edit — Change the name, folder, or password protection
- Copy share link — Copy a no-login URL to the clipboard
- Download original file — Save the original LAS or LAZ file you uploaded
- Delete — Permanently delete the point cloud and all of its data
Upload
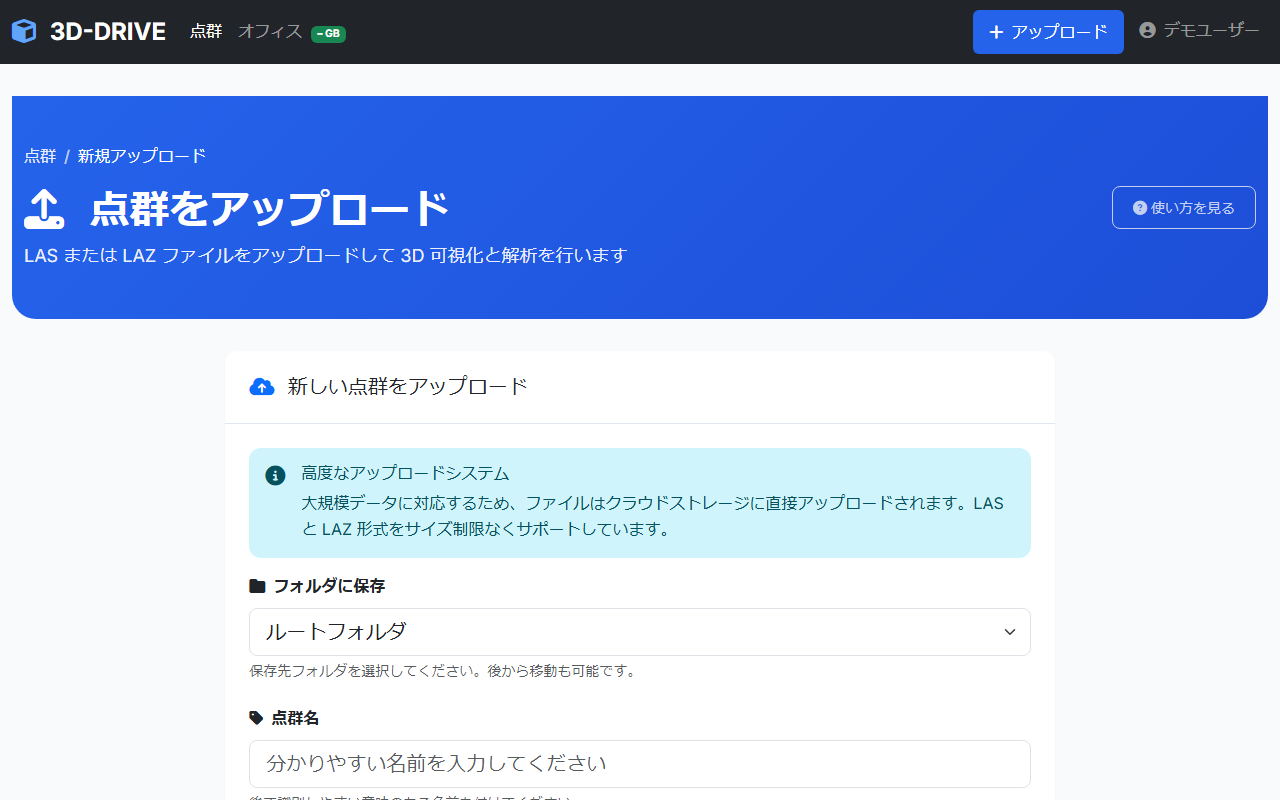
Upload a 3D point cloud file and convert it to a format you can view in the browser.
Supported file formats
Point clouds are LAS or LAZ. Large files (several GB) are supported. LAZ is compressed LAS.
How to upload
In the navbar, click “+” → “Upload point cloud”
You can also start from the “Upload” button on the library screen.
Drag and drop a file, or choose one
Files upload directly to S3, so large files stay reliable.
Set a name and folder (optional)
The file name is used by default. Choosing a folder up front makes the library easier to organize.
Set password protection (optional)
Turn on “Enable password protection” and set a password. Anyone opening the share link will need that password.
Upload finishes → conversion starts
Conversion starts automatically after the upload completes. Watch status on the library screen.
Conversion flow
Conversion time depends on file size and point count. It usually takes a few minutes.
Using the 3D viewer
The high-performance Potree viewer can display hundreds of millions of points smoothly in the browser.
Basic mouse controls
| Action | Mouse |
|---|---|
| Orbit | Left-click + drag |
| Pan | Right-click + drag, or Middle button + drag |
| Zoom in / out | Scroll wheel to zoom |
| Jump to a location | On the point cloud, Double-click (the view moves to center on that point) |
| Select / click | Left-click |
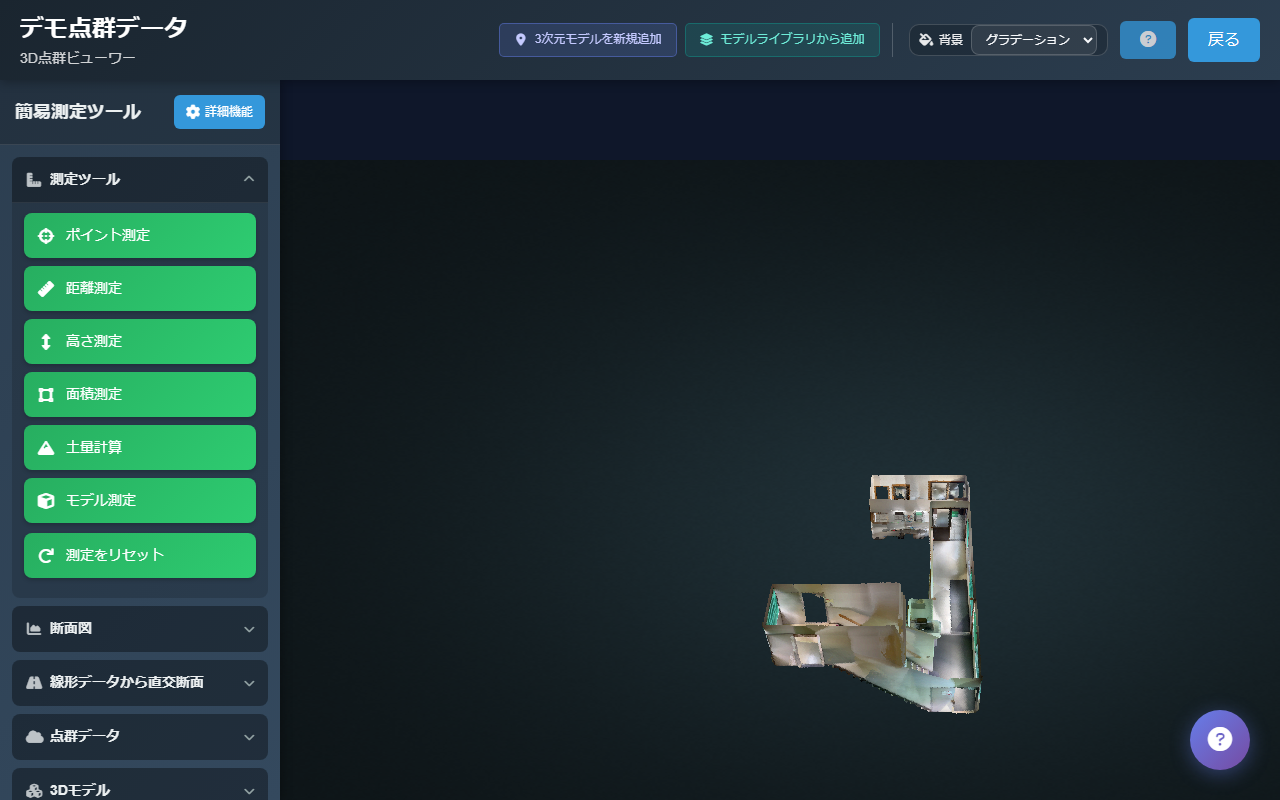
Measurement tools
Measurement tools are listed in the sidebar on the left of the viewer.
Point (coordinates)
Shows the 3D coordinates (X/Y/Z) of the point you click.
Distance
Measures the straight-line distance between two points. You can also chain points into a polyline.
Height
Measures vertical height. Useful for checking structure heights.
Area
Draw a polygon to calculate its area. Use this for planar extents.
Earthwork volume
Draw a boundary of 3 or more points by clicking or by typing coordinates, then run the calculation. The result is the soil volume above that surface. A smaller grid is more precise and takes longer. Backspace undoes the last point.
Model measure
Measure on a 3D model in the scene. Click the model surface instead of the point cloud.
Export coordinates CSV
After placing points with Point Measure, save those coordinates as a CSV file.
Height profile
Draw a section line, then open the 2D profile. Backspace undoes the last point while you draw.
Choose a measurement tool in the sidebar
Click buttons such as “Distance” or “Height” to turn measurement mode on.
Click the point cloud to add measurement points
Each click adds a point. Distance and area tools accept multiple points.
Double-click to finish the measurement
Double-click the last point to confirm the measurement and show the result.
Reset measurements
Use “Reset Measurements” in the sidebar to clear all measurements.
Sections and floor plans
These tools sit in their own sidebar sections, under the basic measurement tools.
Orthogonal sections
Set a centerline by clicking the point cloud, typing two coordinates, or importing alignment XML (RoadGmxml). Then create the sections and export them as DXF.
Floor plan
Draw lines and points on the point cloud, confirm the shapes, and export a DXF. Backspace undoes the last point on a line.
Show multiple point clouds at once
Open “Point Cloud Data” in the sidebar
The “Point Cloud Data” section lists what is already in the scene and what you can add.
Choose “Add Point Cloud”
Select other point clouds in the same office to overlay them in the same viewer.
Overlay 3D models
“Add new 3D model” or “Add from model library”
“Add new 3D model” uploads a fixed model for this point cloud. “Add from model library” places a free-placement model from the office library. You can give each placement its own name on this point cloud. You can filter that list by name or tag.
Adjust position, rotation, and scale
Pick a free-placement model in the sidebar “3D Models” list and align it with move, rotate, and scale. Use Show all or Hide all to toggle every model. Fixed models stay locked once their coordinates are set.
Annotations
Pin notes on the point cloud or on a model. Annotation titles are included in library search.
Open “Annotations” in the sidebar
Choose “Add at coordinate” to place a pin on the point cloud, or “Add on model” to attach a note to a model.
Enter a title and description
Set a pin color and attach JPG, PNG, or PDF files (up to 5 files, 20 MB each). Addresses that start with https:// become links.
Return to a saved view
“Go to view” flies the camera back to the saved viewpoint. “Update view” overwrites that viewpoint with the camera you see now.
Move a model along a route
Animate a free-placement model along a path on the point cloud. The controls are in the “3D Models” section of the sidebar.
Select a free-placement model
Fixed models cannot travel along a route.
Draw the route and confirm it
Click points on the point cloud. Right-drag to move the view while drawing. Confirm the route or press Enter. Backspace undoes the last point.
Set a speed and press Play
The model can face the direction of travel and follow the slope. Save the route by name to load it again later.
Viewer background
Use the background menu in the viewer header to switch between gradient, white, black, and skybox.
Keyboard shortcuts
| Key | Action |
|---|---|
| F | Fit to screen |
| R | Reset view |
| Esc | Cancel measurement mode |
| Backspace | Undo the last point while drawing a measurement, section, floor plan, or route |
Mobile viewer
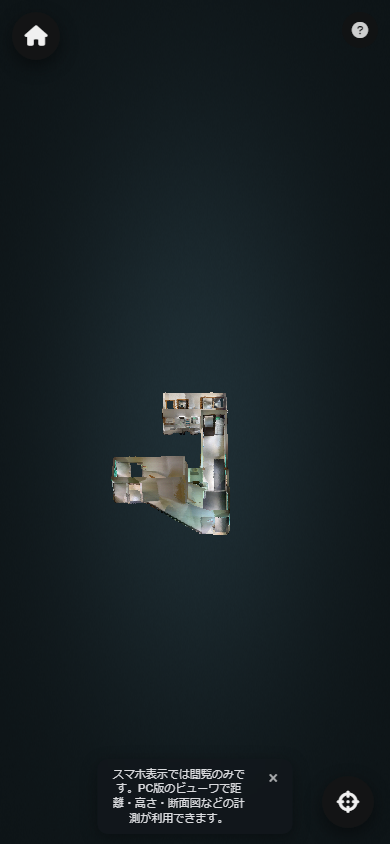
A phone display mode for checks on site. Tablets open the desktop viewer.
Touch controls
Drag with one finger
Orbit the view.
Drag with two fingers
Pan the view.
Pinch in / out
Spread or pinch two fingers to zoom in or out.
Differences from the desktop viewer
- Point, distance, height, and area measurements are available, including CSV export of point coordinates
- Earthwork volume, height profiles, orthogonal sections, floor plans, annotations, and route motion are desktop-only
- You can show or hide 3D models already on the point cloud. Adding, placing, or editing models is desktop-only
- You can view the point cloud full screen
- A button sets the orbit center. Tap it, then tap the point you want to rotate around
How to open it on a phone
Open a share link on your phone
Opening a share link created on a PC in a smartphone browser switches automatically to the mobile viewer.
Add to the home screen and use it as a PWA
Use “Add to Home Screen” in Safari or Chrome to use it like an app.
Sharing
Share point clouds safely with clients and people outside your company using a URL that does not require a login.
Copy a share link
Click the “Share” icon on the point cloud card
Click the share button () on the point cloud card in the library.
Click “Copy link”
Copy the URL shown in the modal and send it by email or chat.
Recipients only need to open the link
The 3D viewer opens with no login required.
Password-protected sharing
Set a password when editing the point cloud or when uploading
Turn on “Password protection” and enter a password.
Send the share link and password separately
Anyone who opens the link must enter the password before they can view the content.
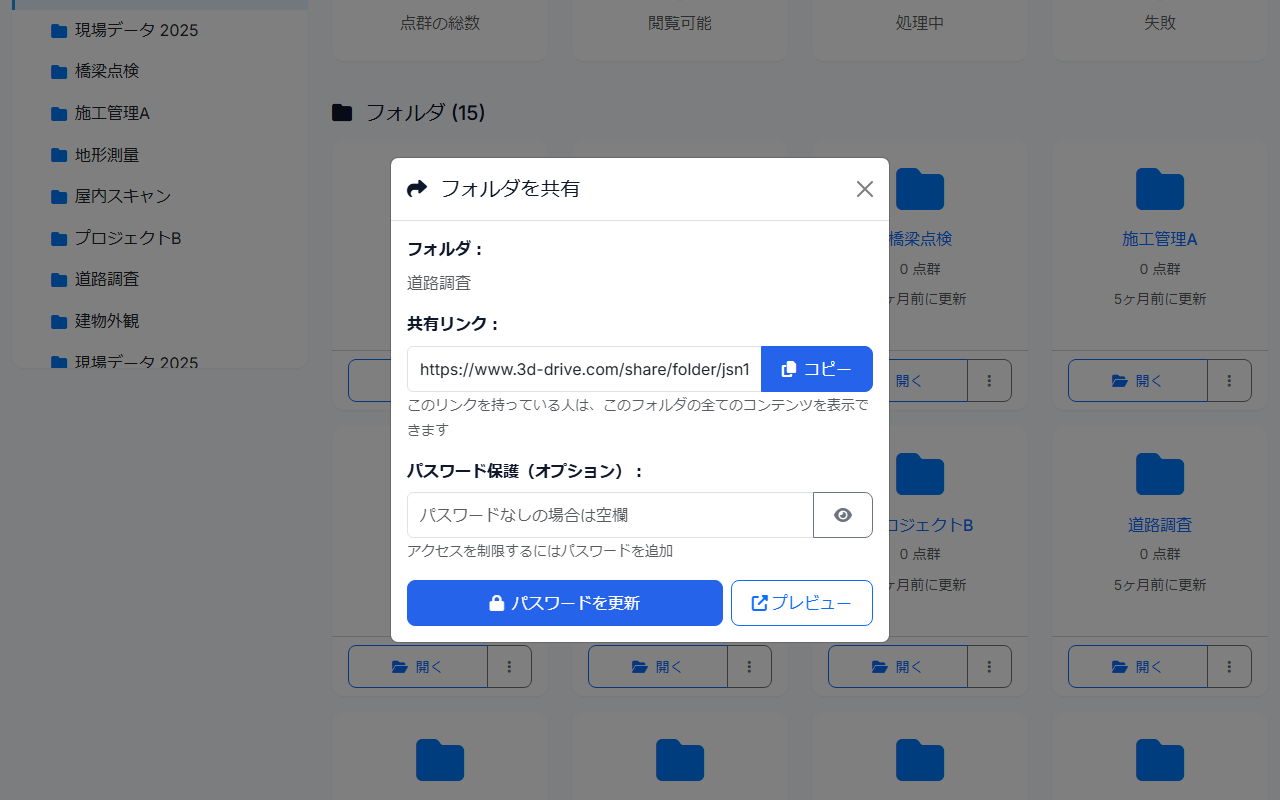
Share an entire folder
Click “Share” on the folder card
You can issue a share link for the whole folder.
Recipients can view every point cloud in the folder
The folder is shown as a public gallery. Recipients can open each point cloud in the 3D viewer.
3D model library
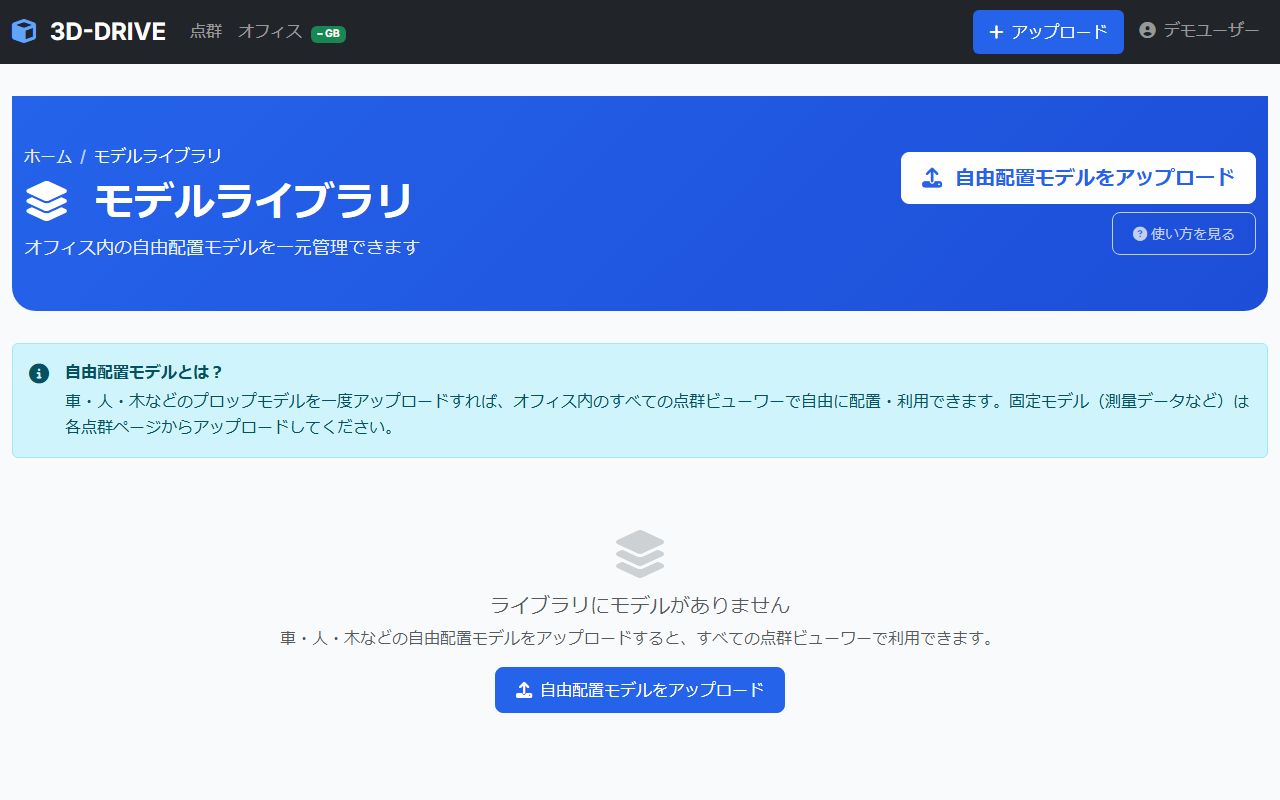
Manage free-placement 3D models shared across the office, then overlay them on any point cloud.
Add a model to the library
Click “Model Library” in the top navbar
Or go directly to /model_library .
Choose a file with “Upload a new model”
OBJ, FBX, DAE, glTF, GLB, PLY, STL, 3DS, and BLEND are supported. Enter a model name and save.
Group free-placement models with tags
Create tags such as car, person, or tree in the model library. On each model, pick a remaining tag to add it, and use × to remove it. Use tags to filter the library and the Add from library list in the viewer.
Model types
Free-placement model
A reusable model such as a car, person, or tree. Upload it once to the office library and move, rotate, and scale it on any point cloud.
Fixed model
A model for this point cloud only, such as survey, road, or BIM data. If the file coordinates already match, it stays locked. Otherwise place it in the viewer and lock it. It is not added to the library.
Use models in the viewer
Click “Add from model library” at the top of the viewer
A list of models already in the library is shown.
Name it and click “Add”
Enter the name for this point cloud, then add it. When you place the same free-placement model more than once, give each copy its own name. The model is overlaid on the point cloud.
Align it with position, rotation, and scale
Adjust each model’s transform from the sidebar list. Changes are saved automatically.
Team and office management
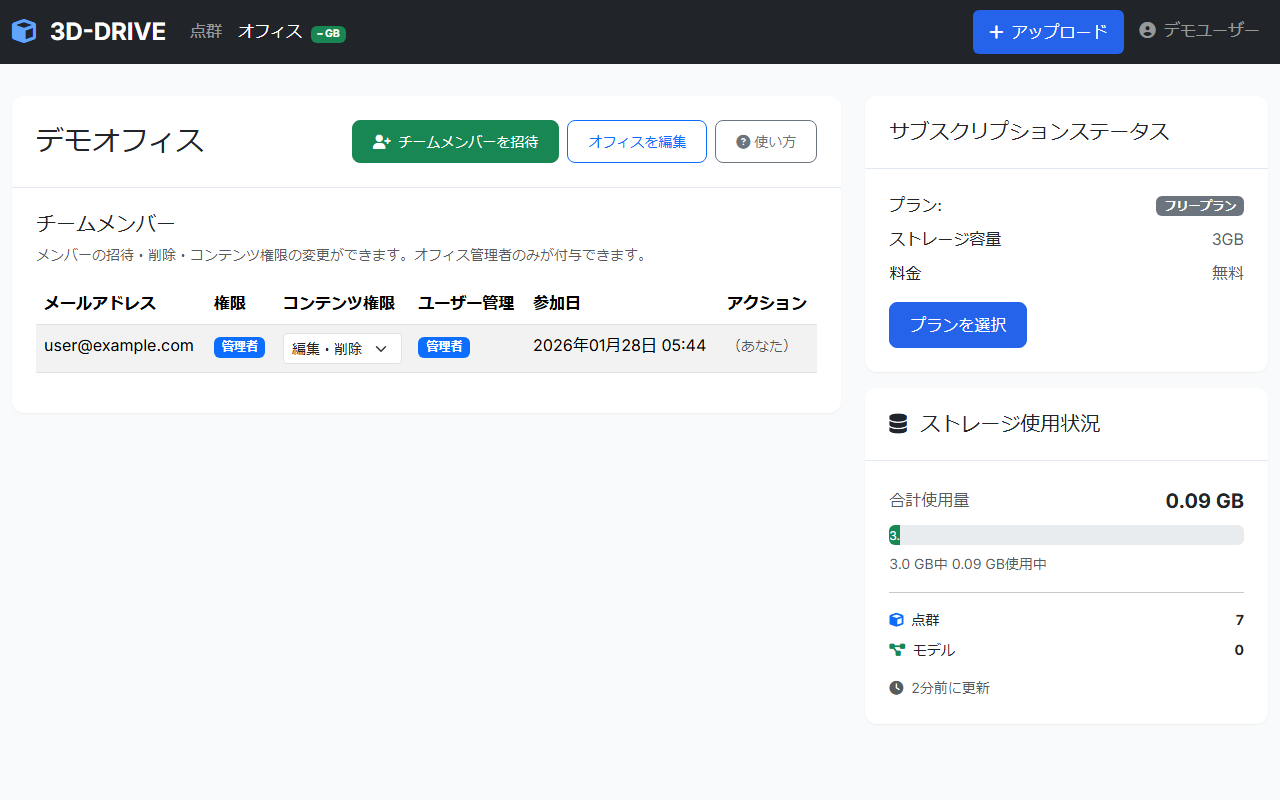
Share and manage point cloud data with multiple members. Split responsibilities with roles.
Invite a member
Open the office page from “Office” in the navbar
Or go directly to /offices/:id .
Click “Invite member”
Enter the email address of the person you want to invite.
They receive an invite email → set a password and join
When they click the link and set a password, they join as an office member.
Roles
| Role | Permissions |
|---|---|
| Viewer | View point clouds and folders only. No upload, edit, or delete. |
| Contributor (can upload) | Upload and edit point clouds and folders. Cannot delete. |
| Editor (can delete) | Upload, edit, and delete point clouds and folders. |
| User admin | Invite and remove members, and change content roles. Cannot change office settings or billing. |
| Office admin | Full access, plus renaming the office, billing, and granting user-admin rights. |
Change a role
Open the member list on the office page
Each member row has a button to change their role.
Choose from the “Change role” dropdown
The change takes effect immediately.
Switch between offices
If you belong to more than one office, switch from the user menu in the navbar → “Switch office”.
Plans and billing
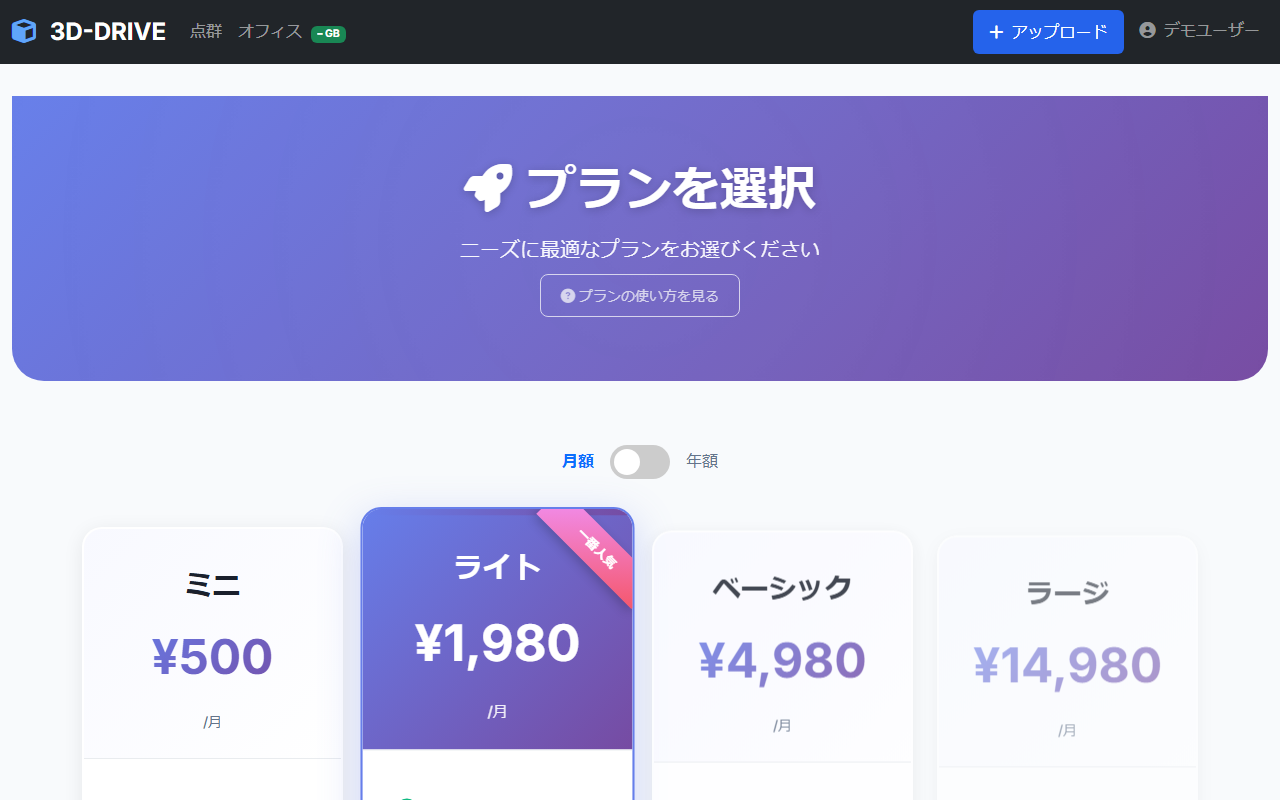
Choose a plan that fits your work. Every plan starts with a free trial.
Plan types
| Plan | Highlights |
|---|---|
| Free | No credit card required. Try 3D-DRIVE with a small amount of point cloud data. |
| Mini | For small projects. Extra storage. |
| Light | For medium use. More comfortable team sharing. |
| Basic | For day-to-day professional work. Large storage. |
| Large | For large projects. |
| Enterprise | For enterprise use. High capacity, with support. |
How to upgrade
Click “Change plan” on the office page
Or open the plan page directly at /subscriptions/new .
Choose a plan and click “Continue to checkout”
You are taken to Stripe’s secure checkout page.
Enter your credit card details to finish
The plan switches as soon as payment completes.
Invoices and payment methods
Office page → “Billing” section
Review the amount, billing cycle, and payment method.
“Open Stripe customer portal”
Download invoices, change the payment method, or cancel the plan.
Try it now
Upload point cloud data on the Free plan right away. No credit card required.